Binary Patching Using Radare2
This blog post will talk about using radare2 to patch a binary on the linux platform. You can read this tutorial with no knowledge of radare, but you will get a lot more out it if you have some basic knowledge about how to use radare.
A Brief Introduction to concepts used in this blog post
Radare2
Radare2 is an open source reverse engineering framework that supports a large number of different processors and platforms. Radare2 is similar to tools like
IDA pro, Binary Ninja and Ghidra, but the main difference is that radare runs inside of a terminal window. This is nice because it means that radare can be used
over a ssh connection or on low power machines. Radare has a lot of awesome features, but this tutorial will focus on the main tool r2.
Binary patching
Binary patching is the process of modifying a compiled executable to change the code that is run. Radare allows for assembly code to be written inline, compiled and inserted into the binary without any hassle.
Okay lets patch a binary
Getting a binary to patch
First off lets get a binary to patch. Here is some source code from challenges.re challenge 55.
#include <stdio.h>

void printing_function(int i)
{
	printf ("f(%d)\n", i);
};

int main()
{
	int i;

	for (i=2; i<10; i++)
		printing_function(i);

	return 0;
};
Compile this using gcc -o patcher patcher.c then make a copy of the binary that we can mess up on when we try to patch it using cp patcher test.
Reverse time
Fist of we need to open the binary in radare with write capabilities.
Run the command r2 -w test and you will be presented with a radare prompt.
Next we need to analyze the binary. From the prompt type in aaa this will tell radare to anaylize all things apart of the binary.
To make this simple we can go in with the assumption that we know the program is written in c. Think to yourself “what is function exists in every c program”.
If you answered main you are correct.
Next we need to seek to the main function. The radare command to do this is very simple ‘s main’.
Now we are at the location of main. After this type the following command V you will then see the terminal change don’t panic or hit any keys.
You are in the default visual mode, the hex editor, we need to swap into the inline disasembler. To do that hit the ‘p’ key.
You should be prompted with something that looks like this.
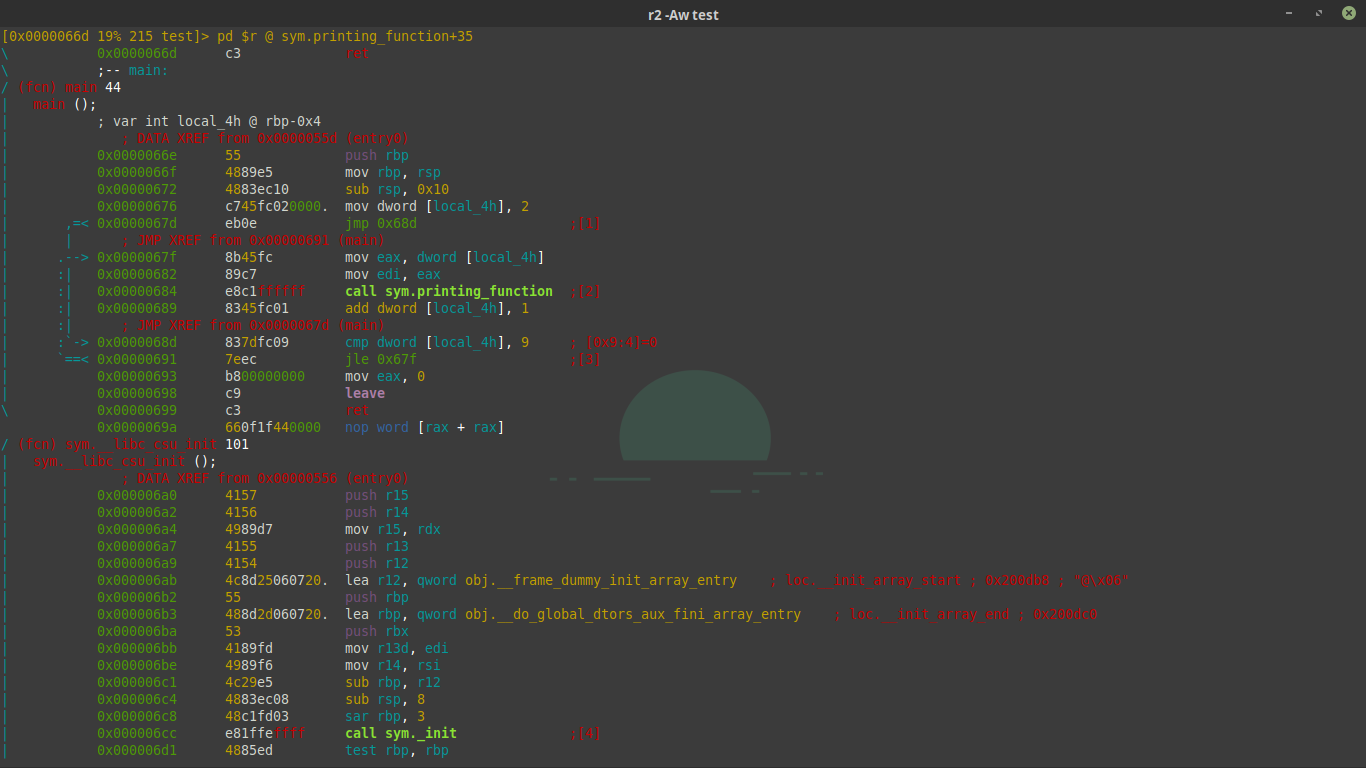
From here you can navigate the disassembly using the arrow keys or J and K like in vim.
Radare makes it very easy to see what variables are mapped to what stack offset. In this case we can see the variable local_4h that is mapped to rbp-0x4 with the type int.
We also see the structure of a for loop starting at the jmp 0x68d instruction and the comaprison statement where the value of local_4h is compared to 9.
We also see the function sym.printing_function being called with the value of local_4h.
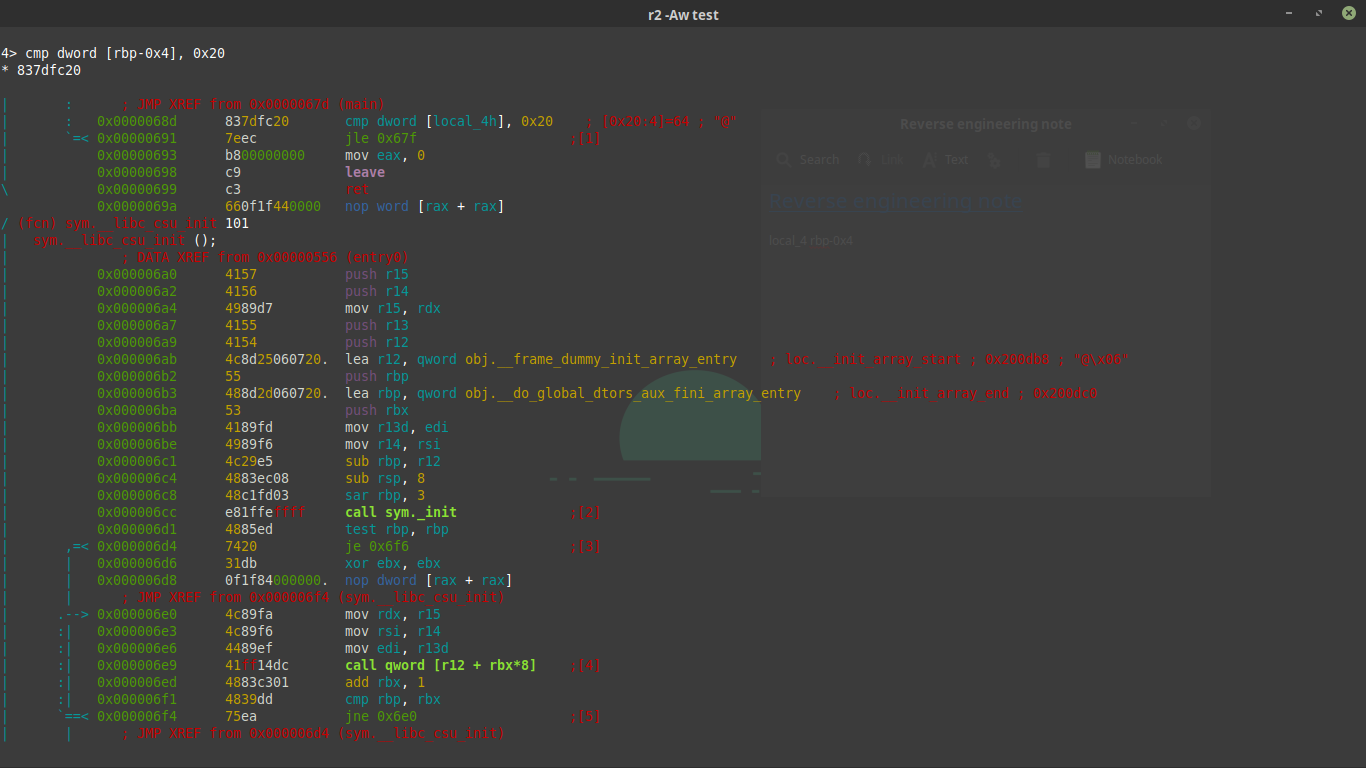
What if we wanted to make it so that printing function was called say… 32 times. We would change the cmp instruction to cmp dword [local_4h_addr], 0x20 , but how do we do that?
The answer is patching the binary using radare’s awesome patching powers. First “scroll” down to the cmp line and press the capital A key. You will be presented with a prompt that allows you to type assembly and have it be compiled and inserted in the place of the cmp line.
Here is what it will look like. The assembly to insert is cmp dword [rbp-0x4], 0x20
To finish off the patch hit enter and then hit q to exit the visual mode and then q enter to exit radare.
If you opened the binary in write mode you should be able to run ./test and get a different output then that of ./patcher
Congrats you have patched your first binary.
Here is a gif from BBC’s James May: The Reassembler to celebrate your reverse engineering adventure.